Everyone is chalkin' it up these days. From walls to mirrors, people are making use of chalkboard paint and I wanted to get in on the action.
At Market Days a couple weekends ago I came across an old window. It was marked for $12, but if anyone knows me they know
This wall has been crying out for something cute, yet functional. We tried hanging floating shelves, fail. We tried hanging some sort of art, fail. We thought about building a cabinet...over budget. All ideas were a no-go until I spotted the window. I saw gold, Chris saw junk. Typical.
While I was out shopping with my bestie, my husband took out the windows and attempted to strip the old paint off. Let's just say the old paint was coated on. There was a light pink layer of paint, a grey layer of paint, and the white layer of paint. After multiple attempts to strip the paint without breaking the (very fragile) window, I decided to paint over it with white and then sand it back down. Here it is before it got a makeover.
The windows were so dirty. Kirstin and I were sure they hadn't ever been cleaned. That's okay because it was nothing a little Windex couldn't freshen up.
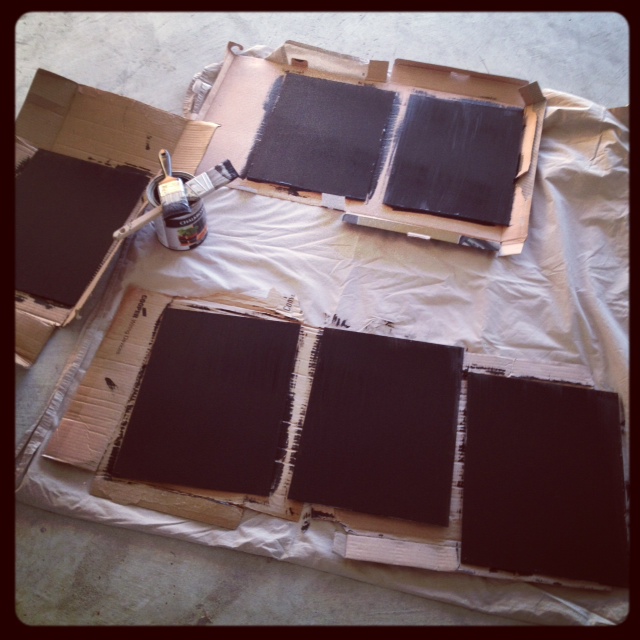
After we made the windows 'so fresh and so clean, clean' we laid them out to be painted. Two coats of chalkboard paint later and these black beauties were ready to be back in their frames.
I would be lying if I said it was easy getting these babies back in the window frame. It was much like a puzzle. Way back when this window was made I am certain they did not use precise measurements. Each window literally had it's own specific spot, unknown to us. We figured that out after literally staring at the window wondering how a certain pane was a centimeter longer than the frame, yet it was supposed to fit back in. After playing musical panes, and maybe breaking a couple windows (oops!), we finally got it all back together. Super glue came to the rescue of the broken panes.
We caulked all the windows in place, much to my engineering husband's disliking. Kirstin and I made him go back and watch the Bama/A&M game (ouch, that game hurt for those Bama fans!) because he was turning our DIY project into an engineering masterpiece. He was called to help when it came time for hangin'. Let that engineering brain work, baby!
Thanks Honey, you da bestest!
And here is the final product! We forgot to actually buy chalk, hence the boring black panes.
I am so happy we finally filled this space. Is it complete? Probably not, but at least our view walking in from the garage is not a blank wall.
We love the functionality of it as well. We can write reminders on the chalkboard, as well as place items on the shelf.
I am one happy Tucker.
So, for $10 we got the window and the chalkboard paint was $16 from Lowe's. We have so much left over that I am certain there will be another chalkboard paint project in my future.
What do you think?! Pretty cute, right?! And cheap! Woo hoo!
Linking up with:


Looks GREAT! Okay....you need to find silver trays at estate sales and paint the center of them. I have a big one over my stove that has "GIVE THANKS" written on it!
ReplyDeleteLove! Oo and love Sheaffer's idea, too! Goodwill trip??
ReplyDelete