Showing posts with label Home. Show all posts
Showing posts with label Home. Show all posts
Decor Favorites: Midcentury Edition
Monday, October 8, 2018
Happy Monday, y'all!
Today I wanted to share some things I am loving in our new home, as well as some things I am eyeing!
I am not sure how we ended up going with the midcentury vibe, but I am happy we did! I would ask Chris's opinion on everything I bought and he always leaned towards the midcentury items.
1. First off - this floor lamp! All the heart eyes. It has a marble base, so it is really sturdy. I was reading reviews and one guy called it the "divorce lamp" because his wife and him struggled so much putting it together. I was crying I was laughing so hard at the review. So funny!! Chris put it together by himself in about 20 minutes, and we are still married, so I would highly suggest the lamp.
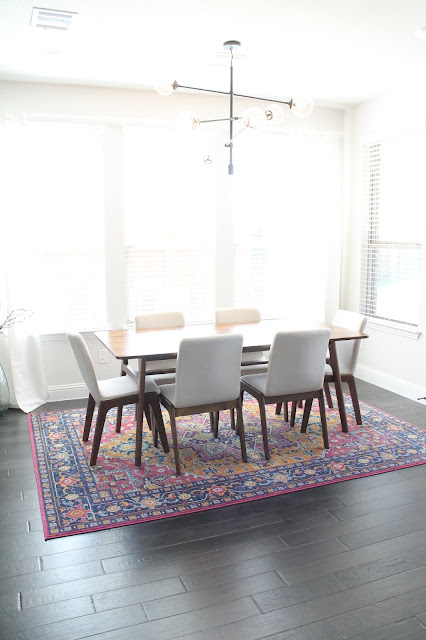
2. This chandelier. At under $200, this thing is a STEAL! It is way bigger than I was anticipating, but I love it. And, Overstock's customer service is amazing. Graham broke one of the glass bulbs and they sent us a whole new light fixture right away, no questions asked! IT was really easy to hand and I love how it looks!
3. This mirror is going up in our half bathroom and I. can't. wait to show you! I am waiting on Chris to install my shiplap and then we can hang it up!
4. Bringing plants into a home instantly warms up the space. Unfortunately, I have a toddler and a black thumb, so no plants will ever survive inside (or outside for that matter!) the Tucker home. Thankfully, this plant and planter is right up my alley and I have a feeling he will be here for years to come!
New House Update: Master Bathroom + Fireplace
Monday, June 11, 2018
Today, I want to give another house update! This blog is a journal that I love to look back on, so I want to make sure to remember this process.
This week's big hold up was our shower flooring in the master bathroom (pictured below). I don't know what we were thinking when we chose our shower floor. The only way I can describe it is if you were buying a Range Rover with cloth seats. LIKE WHO DOES THAT? No one, the answer is no one. I will let the pictures speak for themselves.
See? Terrible. The floors remind me of a locker room shower. Just terrible. In my head I thought the tiles would have the appearance of concrete, but I was, so, so wrong. The sample I chose from was also a 2x2 inch tile, so I blame that as well. Our builder told us to go buy what we want and be on standby for when the tile guy returns. I am SO EXCITED for what we chose. It will be so much better!
In the store I wasn't sure how the hexagons tiles would work alongside the bigger hexagons, but I think they compliment each other perfectly!
Updated: It looks SO MUCH BETTER!
Updated: It looks SO MUCH BETTER!
Now onto the next mess up. Obviously the guys installing our shiplap don't know Joanna Gaines. I don't hate the vertical look, but I prefer the horizontal. I WILL be incorporating vertical shiplap in the house, but you'll have the wait and see where that will be!
I am also obsessed with the subway tile surround on the fireplace!! It looks amazing!
The house is supposed to be done in August, and we can't wait! We will be doing a bunch of renovations (some things the builder wouldn't do) and work on the backyard once we close, so I am eager to get moved in and start decorating!
Happy Monday!
DIY Shiplap for Under $50
Tuesday, February 7, 2017
Including us. We want to be Chip and JoJo, so we were...for a weekend.
I've wanted shiplap ever since we first started watching Fixer Upper and my
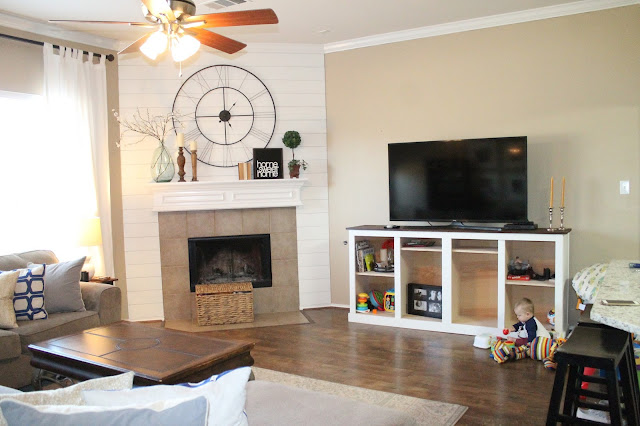
We went to Home Depot and bought the reallyyyy thin plywood called underlayment for $11.99 a sheet. We bought several sheets because we (Chris doesn't know it yet!) plan to do shiplap behind our bed as well, but we only needed about one and a half sheets for the fireplace wall. We had Home Depot rip the wood into 6 inch sections.
When we got home, I sanded down the edges because they are pretty splintery.
After that, it was all measuring and cutting! Chris did an amazing job working around the mantle. We used our brad nailer and nailed the boards into the studs.
Once all the boards were up, I slapped on one coat of paint and called it a day! The paint is not full coverage, but I like that it looks slightly distressed.
Now I am addicted and want it everywhere. Good thing we bought plenty of wood and paint:)
We have big plans for this room. Mount the tv, add scones, new coffee table, add wall decor, and finish that stinkin' tv cabinet. I will keep you all updated as we progress.
What do you think? Do you have shiplap?
PS: don't mind the crooked sign, off centered wicker chest, or the fact that we still haven't attached the doors to our tv cabinet. Shiplap was a priority, people!
Kitchen Reveal || New Counters and Backsplash
Tuesday, March 15, 2016
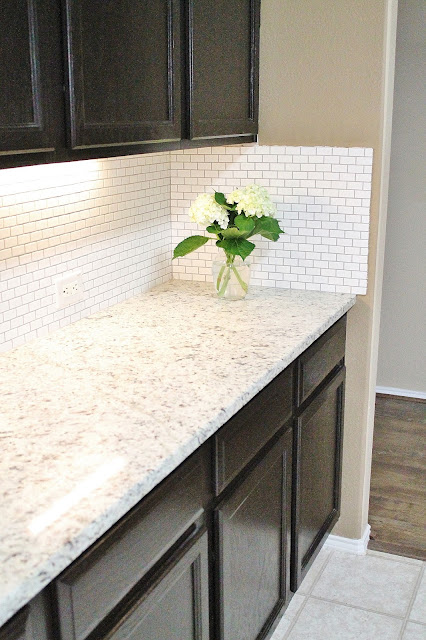
I have been wanting to show off our kitchen for weeks now, but haven't been able to keep it clean or find time it when there is enough light. Finally, last Sunday I was able to capture our new counters and back-splash. We still have some minor touch-ups, but I couldn't wait any longer!
Before I show you, here is a look back at the kitchen when we first bought the house:
After I stained the cabinets:
Reveal:
I can't wait to change out the decor above the cabinets and stage it a little better, but I had to take advantage of the light!
The biggest change is that we got rid of the bar behind the sink. Now it is an overhang that people can sit at to eat and it makes the space feel even more open than before.
We are in the works on getting an island made, so we still have some changes we want to make, but this is progress!
Happy Tuesday!
House Tour || Guest Bathroom Update
Tuesday, December 1, 2015
BEFORE
I give a lot of credit to the previous owners of our house. All of the rooms were painted a decent color and nothing made us go, "WHAT WERE THEY THINKING?!" (You can see how the house looked before we moved in here.)
With that being said, there are some rooms that we've been wanting to paint and we have finally gotten around to it...the guest bathroom being one of those spaces.
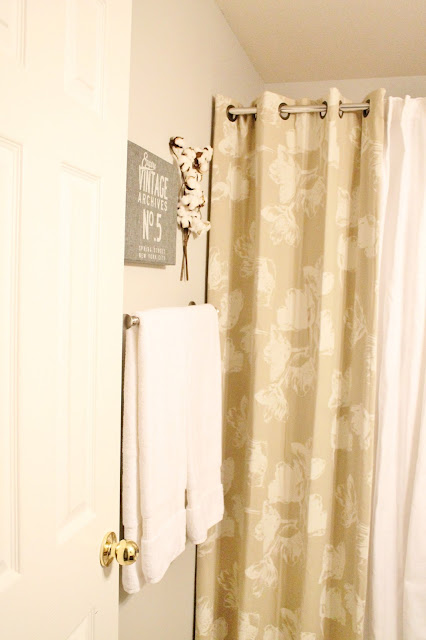
The previous color wasn't terrible, it just made the space feel really dark. That, coupled with the super cool and stylish 90's light fixture (you know the one that is just a row of bulbs?), made for a really dark space.
We had some paint leftover from painting little man's room, so we decided to do some minor upgrades to the guest bathroom.
We changed out the light fixture, faucet, towel bar, paint, and are currently in need of a new towel hook. These simple changes made a world of difference!
We are still wanting granite and new floors in this space, but we want it to match the kitchen and we haven't gotten that far yet, so the waiting continues!
All in all, for less than $200 we were able to update some keep pieces in this bathroom that make it feel new again!
PS: The lighting is making the room look a little yellow, but I promise it is a much brighter space than before! Aren't bathrooms without windows the worst to photograph?
Sources:
Paint - Repose Gray by SW
Light - Home Depot here
Faucet - Home Depot
Moss T - DIY here
Other decor from HomeGoods and random other places!
DIY || $20 Garage Door Upgrade
Tuesday, June 23, 2015
You know those cars with the eyelashes on the headlights? The eyelashes are supposed to add pizzazz to what is usually a normal, run of the mill car. Although I've never been bold enough to deck out my car with falsies, I am willing to deck out the front of my run of the mill house with some new bling.
Okay, it's not exactly bling, because Chris nor I are kin to Jay Z or Bey, so we can't afford an actual blinged out house, but we did splurge on a $20 hardware kit to spruce up the ole plain white rectangle, otherwise known as a garage door.
Slowly but surely we are turning this little house into a home. I haven't killed all our flowers and our painted front door is still a hit. I really want to rip out all those bushes, but, you know, time is not what we've had a lot of lately. And, although I think I'd be willing to tackle it on my own while Chris is at work, him and his dad are the yard masters, so I will leave it to them!
Here is a before and after:
Just adding this little touch made a world of difference!
New Clock || Living Room
Thursday, May 21, 2015
I know. I change my mantel like I change my undies. Everyday.
Okay, not that often, but I haven't been able to find my mantel sweet spot until now.
This clock. Oh my. Gimme all the heart eyes. Even Chris is googly at it. It is perfect. And cheap! We got it at At Home for $70! Right when we hung it we were smitten.
My plans for the rest of the living room are to save up our spare change and get a large tv console like this. I also want new curtains that are lighter in color. I am hoping to swap the curtains this summer and possibly find a console that I can refinish for a cheaper price. We shall see! A new coffee table is also on the list as well as, possibly, a new paint color. I really want to go with a light grey, but I am not willing to repaint, so I'm sure the paint won't be changing anytime soon.
When all that is said and done I think we will be able to call this room finished, but knowing me, it will never be done.
PS: Nordstrom's Half Yearly Sale is going on now! This shirt is simply perfect and this watch is 45% off!
Happy Thursday!
DIY || Painted Front Door
Monday, March 30, 2015
Ever since we moved in to our house last March I have hated our front door. It looked so dingy and the color was somewhere between primer and off-white.
We went to look at doors on Saturday (more on that tomorrow) and didn't see anything worth spending a thousand dollars on, so we opted to just paint it for now. I really want a front door with windows to let in some natural light, but I really want counter-tops more :)
The weather was perfect here in Dallas and I was able to have the door open all day allowing me to paint without having to worry about the house being too hot or too cold.
Because of our HOA, we are limited on the colors our front door can be, but I love black doors, so that's what we went with. The exact color is Black Suede by Behr.
I bought exterior paint with a primer, so all I did was lightly sand and clean the door before applying the first coat. I used a brush around whateveryoucallthoserectanglethings and then rolled over the brush strokes with a foam roller. It took three coats and we are in love with the results!
BEFORE
DURING
AFTER
This was our most productive weekend all year and a lot of what we did involved the doors in our house! I can't wait to show you our next project tomorrow!
Happy Monday!
Subscribe to:
Posts (Atom)


